
9
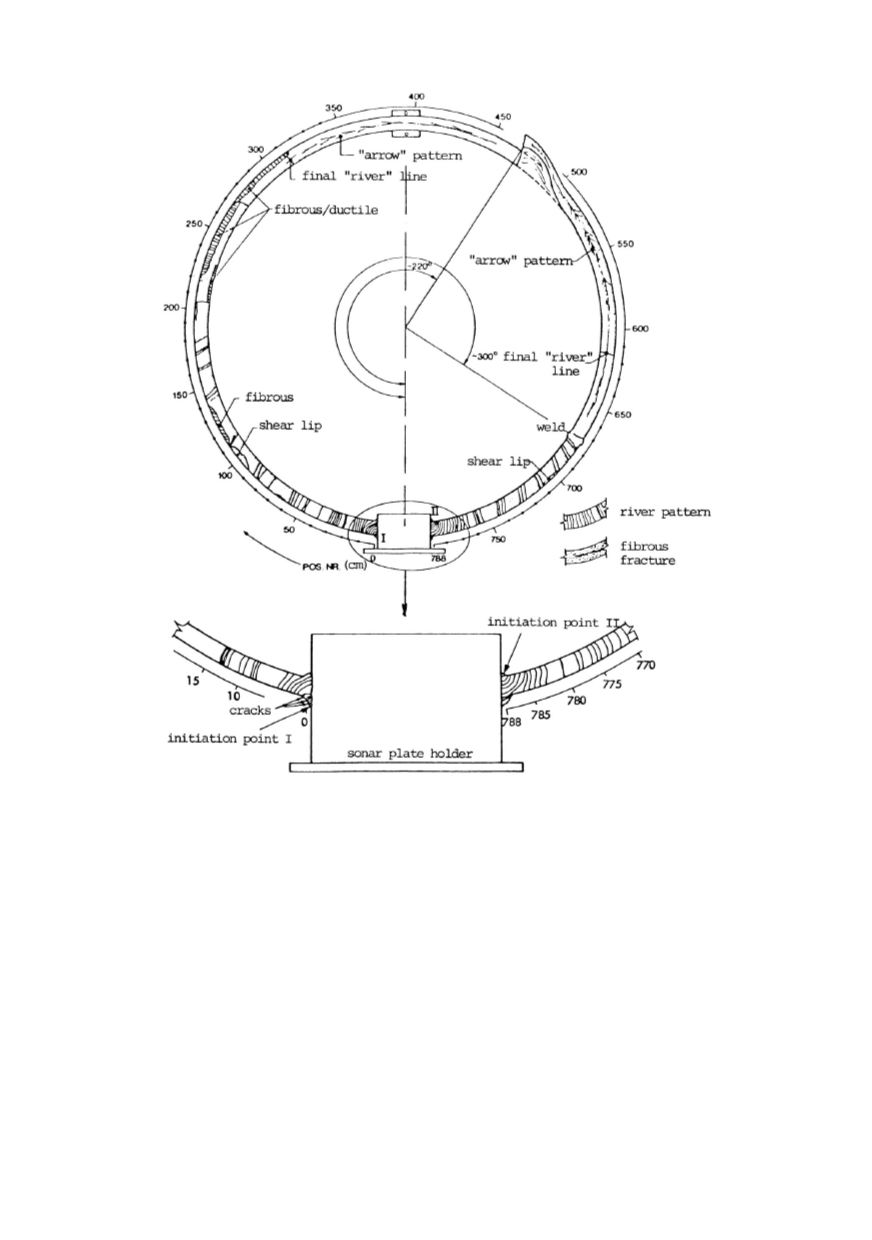
Figure 5: Scheme of crack development on the fracture surface of
9.
Hardness measurements were carried out on the fillet-welded joint, and these results
are given in Fig. 7. The maximum hardness is associated with the HAZ of cylindrical
part, reaching values of 350 HV, compared with about 160 HV in the base material. The
hardness of the as-solidified weld metal lies between these values.
10.Microstructural and mechanical properties of both the flange plate and bracing plate
materials are summarized in Table 1. Note that although the grain sizes in both materials
are small, the transverse (through-thickness) properties of the flange plate material are
exceptionally poor. Fatigue life experiments were also carried out on the main bracing
material, giving satisfactory values for the stress ranges expected.
11.Stress analysis of the effect of the sonar flange hole on stress concentration in the
bracing material, with and without the flange plate in position, was carried out. This
showed that if the flange plate had not been present the stress concentration would almost
double, reaching a value of about three times that of the mean stress in the bracing. If the
flange plate had been intact, the maximum stress concentration would be about 1.8.
12.Examination of bracing A-5; B-5, also with sonar flanges, revealed no signs of failure.


